Meet tmux, my preferred terminal multiplexer
If terminal multiplexers are awesome, tmux is even more! If you’re not using a terminal multiplexer like tmux, iTerm, Terminator, etc., chances are you’ve not achieved the full productivity of command-line interfaces yet. Resuming: it allows you to have multiple terminals into one screen (and eventually much more). Check out the screenshot below (from the tmux page on Wikipedia):
 A tmux session with a window containing three panes.
This post will introduce you to tmux, teach some tricks and suggest some usage patterns to make you even more hacker then you already are.
OK, but why should I use a terminal multiplexer?
When working with command-line interfaces you frequently needs to multitask. For example, when coding a website you need to run Grunt or gulp tasks. You can use tmux to code your JavaScript using Vim on the left pane (left side), and keep the automated tasks running in the right pane (right side). That way you save yourself from cycling programs and/or tabs with Cmd+Tab or Ctrl+Tab.
This is just an example. After you start using it you’ll find lots of new ways to tmux. ;-)
How to install tmux
If you use Debian, Ubuntu, elementary OS any other Linux distribution that uses APT to manage software packages:
$ sudo apt-get update
$ sudo apt-get install tmux
Are you using OS X? Install it using Homebrew:
$ brew install tmux
tmux is now installed in your computer. Yay!
tmux: the basic concepts
To start tmux, just run:
$ tmux
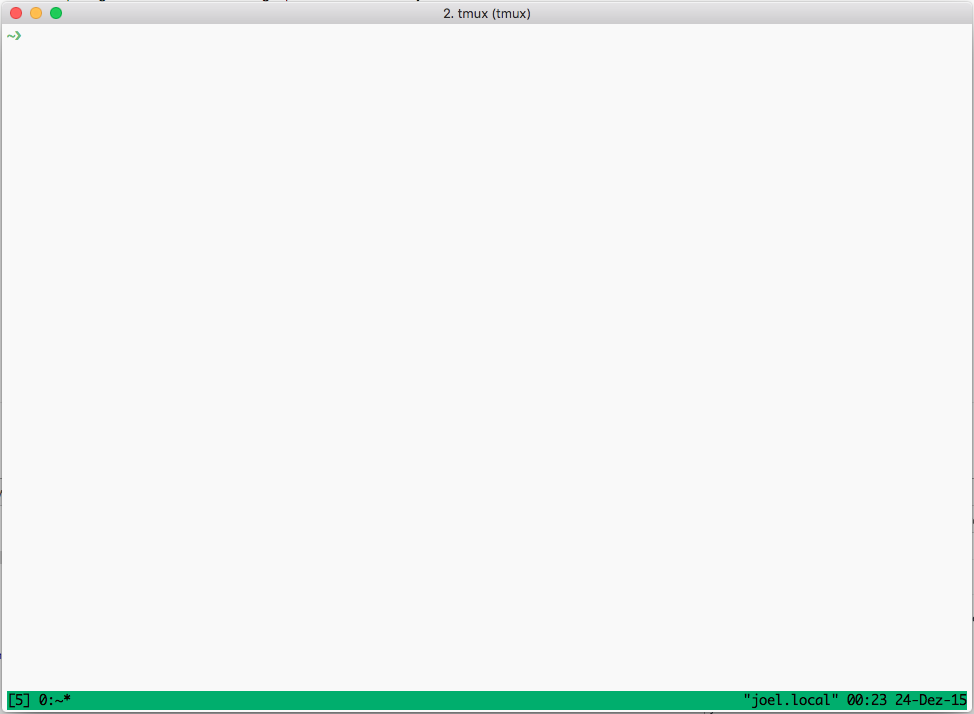
This command will start a new tmux session. You should see something like this:
 My customized iTerm running tmux. And yeah, I use iTerm AND tmux! ;-)
After starting tmux, it will take your entire terminal screen space. At this point you already have a tmux session, one window and one pane, right in front of you. Let’s take a minute and understand what are these things:
- Session
It’s just a collection of pseudo terminals controlled by tmux. A tmux session have one or more windows. - Windows
They are like workspaces that occupies the entire screen (think about it like the multiple desktop functionality present in OS X and also many Linux desktop environments like GNOME and Unity). A window can have one or more panes. - Panes
It’s where you’ll run commands and work on. A pane can occupy the entire screen (since you just started tmux that’s your case) or only a portion of it, like the left or right side, etc.
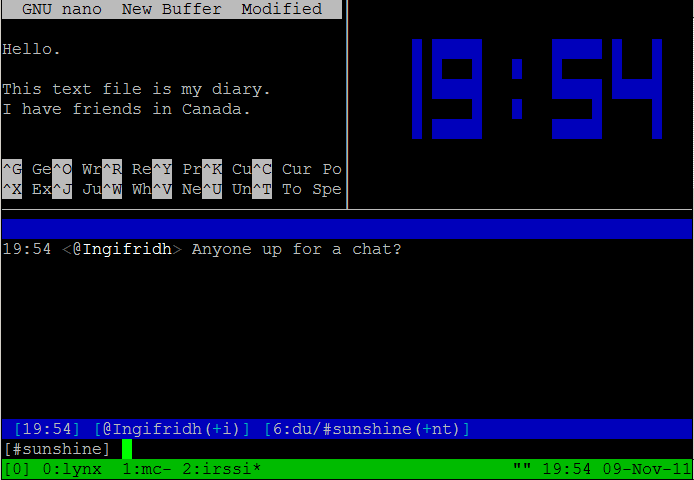
If you look at the tmux screenshot at the beginning of this post you’ll see an usage example of tmux with three panes: the top left one running nano, the top right one showing the tmux’s clock and the bottom one running a program to chat at some IRC channel. All these panes are in the current window (remember, a window occupy all the available screen space of your terminal), and this window is inside a tmux session.
Check this other example:
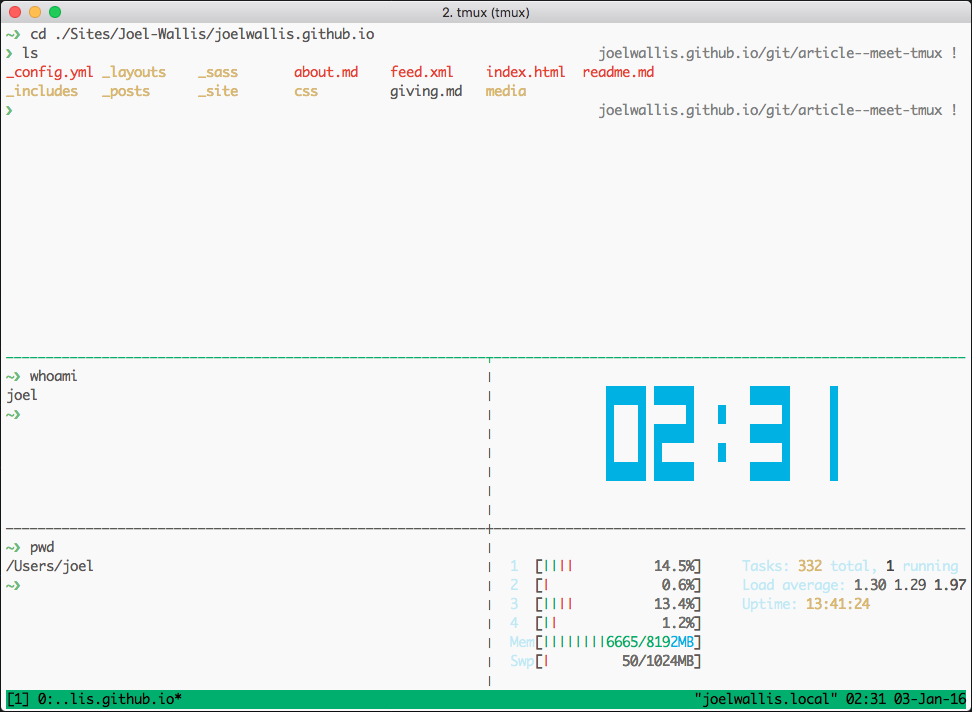
Here I’m using a slightly more complex setup of tmux with five panes: one at the top, listing the source code of this blog, two at the left bottom showing some infos and two at the right bottom showing the clock and htop, respectively.
As you can see, your own workflow needs and creativity will tell you how to use it. So, now let’s learn how to take control of tmux.
Working with panes
tmux is controlled by keyboard shortcuts. They’re combinations of a prefixed key (Ctrl+B by default) followed by a command key. So, to split the current pane vertically, you hit:
Ctrl+B, %
That’s it. You hit Ctrl+B and then you hit %. After entering the key combination you should see two panes: the left one and the right one.
Now, to split the current pane vertically, hit:
Ctrl+B, "
See? It’s easy! Now check my list of my favorite pane commands:
Ctrl+B, %
Split the current pane vertically.Ctrl+B, "
Split the current pane horizontally.Ctrl+B, <Up>,Ctrl+B, <Down>,Ctrl+B, <Left>,Ctrl+B, <Right>
Go to the pane on the top/bottom/left/right side of the current pane, respectively.Ctrl+B, t
Show the time - a digital clock that takes the entire pane space.Ctrl+B, z
Toggle the zoom of the current pane.Ctrl+B, x
Destroy the current pane.
Working with windows
tmux windows are as useful as workspaces of destop environments like OS X, GNOME, etc. To create a new window, enter:
Ctrl+B, c
After entering the key combination you’ll get a brand new window with one pane occuping the entire screen. You can go back to the previous window by entering:
Ctrl+B, p
You can also go to the next window by entering:
Ctrl+B, n
Below is my list of my favorite window commands:
Ctrl+B, c
Creates a new window.Ctrl+B, n
Goes to the next window.Ctrl+B, p
Goes the previous window.Ctrl+B, c
Creates a new window.Ctrl+B, ,
Rename the current window.
Working with sessions
If you still are inside tmux, enter the following combination key: Ctrl+B, d. This command detaches you from the current tmux session. Let’s understand a bit more about it.
tmux sessions are persistent, which means that you if you’re using tmux to work in your blog you can just detach from the tmux session, do something else and then get back to work by attaching to the tmux session again. So, to check which tmux sessions are currently being running in your computer, run:
$ tmux list-sessions
You should see something like this:
0: 1 window (created Sun Jan 3 22:13:35 2016) [88x43] (attached)
Each line represents a different tmux session. In this case, I have only one session with ID 0 which has only one window. If I wanted to attach to this tmux session I would run:
$ tmux attach-session -t 0
You’ve just attached back to the session you were working before. Now you know what to do when you get connection issues while connected to your server. If you were using tmux that’s not a problem anymore. \o/
Well, tmux sessions are a lot more difficult to understand than windows and panes, so I’ll limit the scope of this post to just teaching you how to attach and detach from a tmux session. If you would like to go serious on it you can just read the tmux manual by running $ man tmux.
Useful links
Now you can start using tmux in front of your friends:
This article ended up being a quite big one but I hope you’ve enjoyed learning tmux. Feel free to reach me on Twitter to chat about cool things related to command-line interfaces. ;-)